How To Build a Model Railway

Building a Model Railway
Buying a Hornby train set is the ideal way to start your model railway collection, but what other Hornby products are available to help you take that first step from train set to model railway? Whether building your first TrakMat layout, or extending your train set to a larger model railway layout, the basics are the same - you need to know how to lay down track, add electrical connections and scenic your layout.
Hornby TrakMats
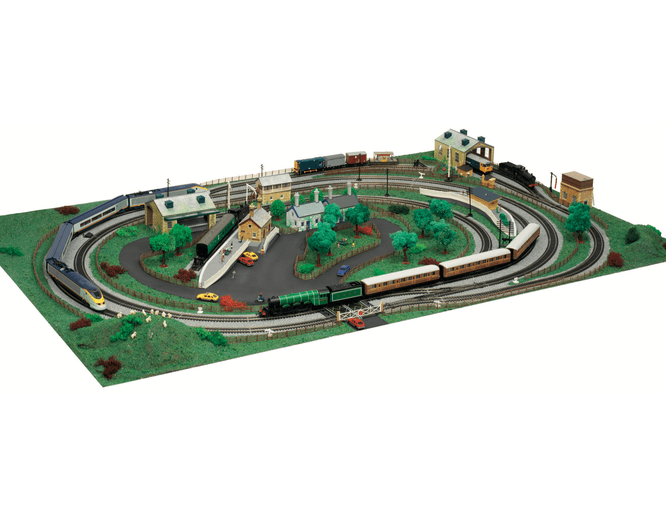
All Hornby train sets come with a TrakMat - a scenic underlay sheet which you can use as a base for your layout at any stage in its development . A TrakMat also tells you where to put the track, buildings and other accessories to complete the full TrakMat layout.
Baseboards
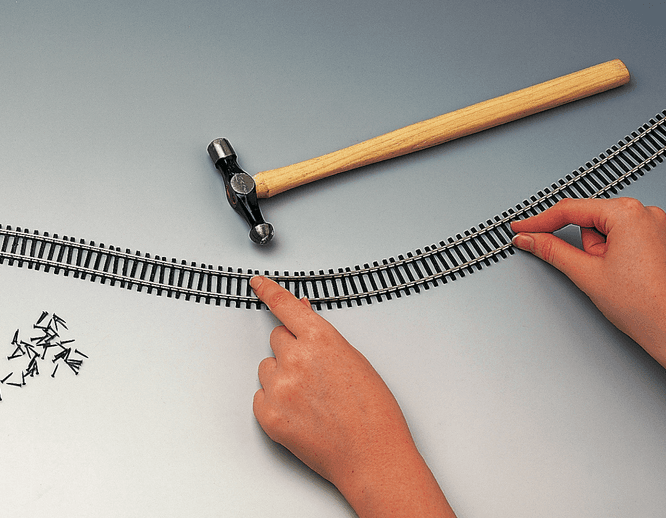
Wherever you use your TrakMat, it must have a firm base to be put on. The easiest way of doing this is to construct a baseboard. There are many ways of building a baseboard, but the most popular and standard construction is to use a top surface of insulation board such as Sundeala, with a supporting frame of softwood battens (minimum 50mm x 25mm) running along and across the underside of the board at intervals of 600mm or less.
This type of baseboard can be constructed to almost any size and shape, although for a TrakMat layout, the baseboard will have to be a minimum of 1800mm x 1200mm (6ft x 4ft) in size.
Track Extension Packs
Extend your set in easy steps by adding Hornby Track Extension Packs all the way to the full layout pictured on your TrakMat scenic underlay sheet.
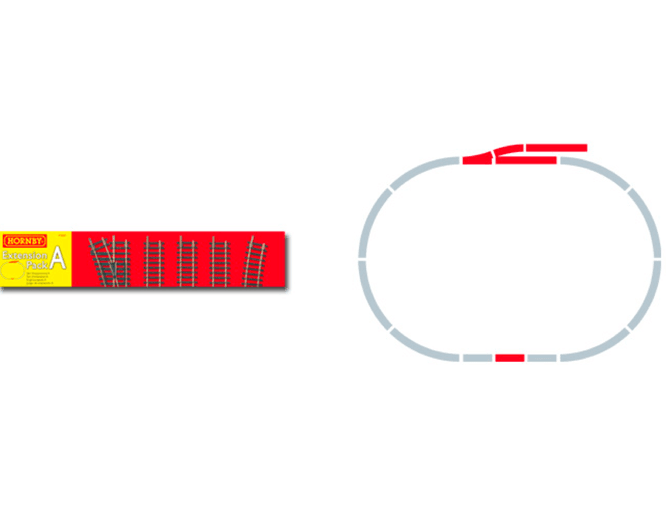
R8221 Extension Pack A
Add Extension Pack A to the Starter Oval supplied with the smaller Hornby train sets to make this layout.
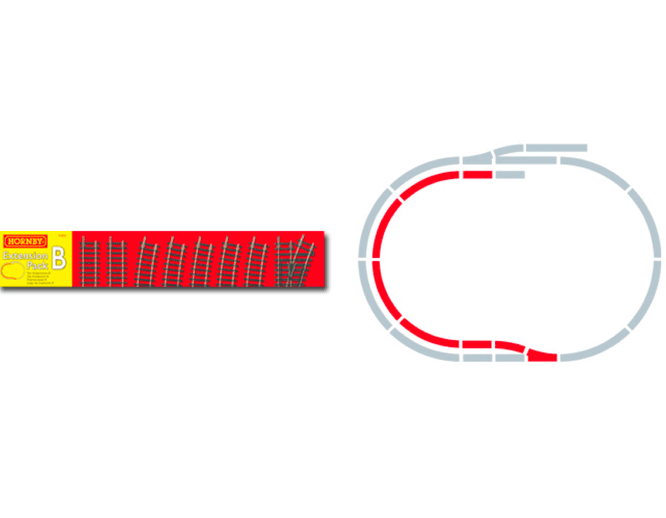
R8222 Extension Pack B
Add Pack B to the Starter Oval + A to make this layout.

R8223 Extension Pack C
Add Pack C to the Starter Oval + A + B to make this layout.
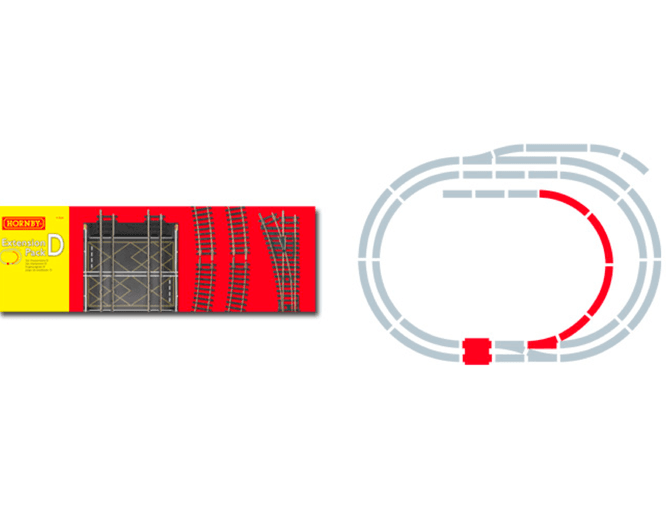
R8224 Extension Pack D
Add Pack D to the Starter Oval + A + B + C to make this layout.
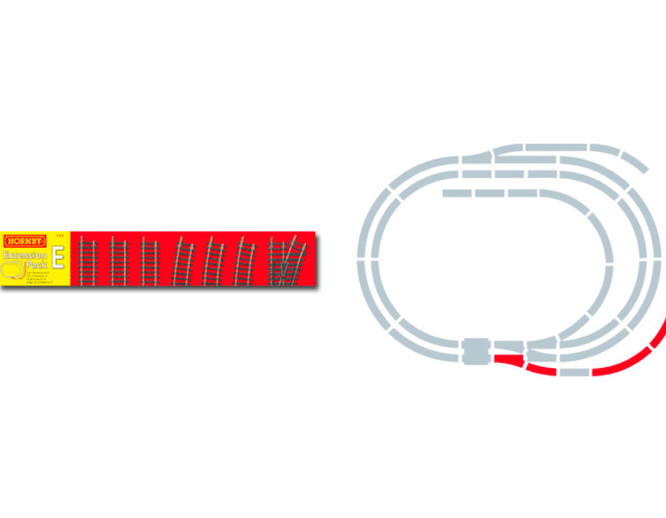
R8225 Extension Pack E
Add Pack E to the Starter Oval + A + B + C + D to make this layout.

R8226 Extension Pack F
Add Pack F to the Starter Oval + A + B + C + D + E to achieve the full TrakMat layout.
Download the full Track Geometry
Everything you need to know to plan out your new project.
TrakMat Accessory Packs
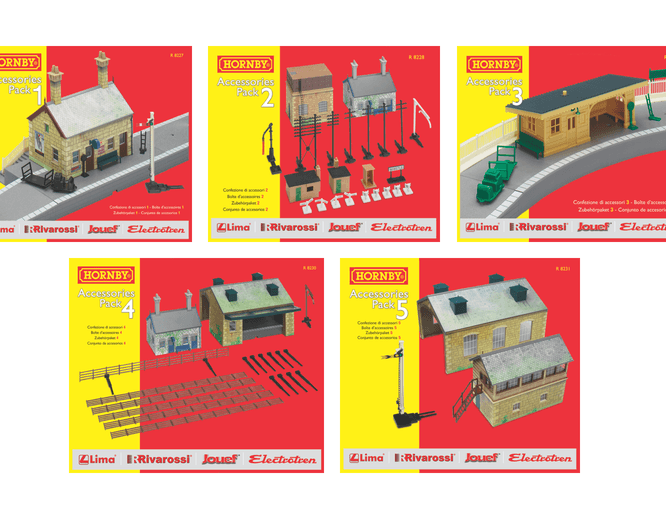
The TrakMat layout also gives you space to add a variety of buildings, which are available in these TrakMat accessory packs.
- Pack 1 contains a platform, station building and signal.
- Pack 2 contains a water tower, railway cottage, and various trackside accessories.
- Pack 3 contains a larger curved platform and platform shelter with luggage and accessories.
- Pack 4 contains a loading shed, railway cottage and trackside fencing.
- Pack 5 contains a goods shed, signal box and signal.
Power and Control
Once you have your baseboard built, TrakMat fixed down and track in place, it is a simple task to plug in Hornby's standard power supply system - the transformer plugs into the controller, the controller plugs into the power clip and the power clip plugs into the track - all these items come with your train set.
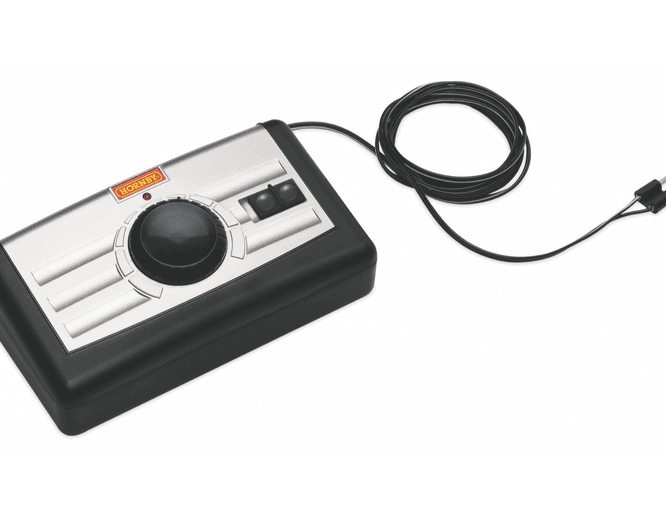
However, to control the full TrakMat layout, you will need at least one more controller, so you can control two trains or more at the same time on different circuits. The Hornby HM2000 controller is a complete transformer and speed control unit in one, with built-in control for two separate trains and bi-directional running.